Tuesday, 28 January 2014

TeaM Madleets got Hacked by ZHC (ZCompany Hacking Crew)


The biggest news for Pakistani users and hackers.Madleets got hacked by ZHC. Due to some personal reasons they hack madleets. Yeah its a true statement that every DOG his day and today is Madleets day. :D

ScreenShot


Domains:


  • http://b0x1.madleets.com/index.html
  • http://b0x2.madleets.com/index.html

If you like our post or have any suggestion or got stuck at any steps implementing the widget to your blog then leave a comment below i will be glad to help you out. Subscribe to our blog, Like us on Facebook, +1 on Google+. Keep Blogging!

Thursday, 23 January 2014

How to Make Text/Walk In Blog Posts


When we watch a TV news program other television stations, we often find some important news text that is displayed in the form of running. The text that runs it is called by the name of Running Text. In the world of Webmaster, Running Text has another term is "Marquee".
By adding a marquee effect on the text, the center of attention of visitors to the text it will be more focused. So for bloggers who want to make an announcement, you should use the marquee effect. 
Adding a marquee effect on a text is not difficult because the HTML code used is very simple:
<marquee> Text Here ... </ marquee>

Marquee Demo


The text runs to the left
Welcome to tutorialblogspot.com
Walk to the right text
Happy blogging for all of Indonesians bloggers
Text goes up
This is the best site to learn about blogs
Text goes down
How to make moving text in blogs
Text goes back and forth (to the left and to the right)
Get tips computer tricks here
Zig-Zag running text
Zig Zag Walk Text Posts

1. The text runs to the left
<marquee> Text here ... </ Marquee>
2. Walk to the right text
<marquee direction="right"> Text here ... </ Marquee>
3. Text goes up
<marquee direction="up"> Text here ... </ Marquee>
4. Text goes down
<marquee direction="down"> Text here ... </ Marquee>
5. Text goes back and forth (to the left and to the right)
<marquee behavior="alternate"> Text here ... </ Marquee>
6. Zig-Zag running text
<marquee direction="up" behavior="alternate"> <marquee behavior="alternate"> Text here ... </ Marquee> </ marquee>
Is marquee code above we can customize? Obviously could, marquee above HTML code can be adapted to the style or desire of bloggers. Consider the example below! 

1. Text stop when directed Cursor
Code: onMouseOver = "this.stop ()" onMouseOut = "this.start ()" Example application code: <marquee onMouseOver = "this.stop ()" onMouseOut = "this.start ()" > Text here ... </ Marquee>
2. Adding Background in running text
Code: bgcolor = "blue" (Blue is the color code, can be replaced with a favorite color pal) Examples of the application of the code: <marquee bgcolor = "Blue" > Text here ... </ Marquee>
3. Set the text speed run
Code: scrollamount = "2" (figure 2 is the speed of running text, please adjustable) Example application code: <marquee scrollamount = "2" > Text here ... </Marquee>
4. Set the width of the text runs
Code: width = "300" (Set own width. If bloggers want to set too high, just replace the word bloggers width becomes hight) Examples of the application of the code: <marquee width = "300" > Text here ... </Marquee>

Marquee text or text runs can also be applied to the widget. You can simply put the widget code BETWEEN marquee code.

If you like our post or have any suggestion or got stuck at any steps implementing the widget to your blog then leave a comment below i will be glad to help you out. Subscribe to our blog, Like us on Facebook, +1 on Google+. Keep Blogging!

Upload Files and Download in Blogger

Upload Files For Download in Blogger

Blogger is one of the best blogging CMS (Content Management System) which is being used all over the universe. The main feature of this platform is that it is free of hosting which means we just need to purchase domain only without hosting if domain is required otherwise we can also use free sub-domain. Well, when we create blog post, sometimes we need to upload data/files for public download or which can be downloaded into blog reader’s system. But unfortunately, there is no option to upload files that can be due to free hosting and also for avoiding people from uploading unnecessary, spam and malware data in Google servers. So, sometimes people get confused where to upload files for download now and you can be one of that confused people. Don’t worry, we’re here, below we’ll be showing you that how can we easily upload files for Download in Blogger.

So, How can we upload files for download in Blogger?


So, There is no option to upload files for direct download in blogger and still we're eager for it. When we don't have any needable option in Blogger, we can make use of external services. It means if we can't upload files directly from Blogger then we can upload data somewhere else and insert the direct download link in Blogger post editor. Here, we'll make use of Google Drive which is awesome cloud hosting and file sharing service. First, we'll add data into our Google Drive account after that we've to make the data public because everything that you upload in Google Drive is private means only for you but here we want to make it for public download. After storing data in Google Drive and making it public, It's time to insert the download link or download button in blogger and let your visitors download the files.
Let's Try It - Tutorial


  • Go To Google Drive >> Create >> Folder
  • Name It Something Such As "Downloads"
  • Open That Folder >> Click "Upload Icon" and Choose "Files".
Upload FIles


  • Now Select The Files That You Want To Upload.
  • When The File is Uploaded, Right Click On That File.
  • Click "Share" and Once Again "Share".
Sharing File

  • Now Pop Up Box Will  Appear.
  • In The "Who Has Access" Section, Click "Change".
  • Here Just Tick Mark "Public On The Web" and Save It.
Public On The Web and Save
  • Now Same Box Will Appear Back and At The Top, There Will Be Link in "Link To Share" Box. Copy That Link and Paste It in Notepad.
  • Copy This Green Colored Link and Also Paste It in Notepad https://docs.google.com/uc?export=download&id=FILE-ID-GOES-HERE
  • Now Look In The First Link Which You Copied From Google Drive. It Will Be Having File ID Which Looks Like 0ByNodV_m9cVLN1loc2JXZGJQUjQ
  • Copy Yours File ID and Replace It With FILE-ID-GOES-HERE in The Second Link Which You Copied From Here.
  • Now The Second Link Will Look Like This https://docs.google.com/uc?export=download&id=0ByNodV_m9cVLYTRKbjVIYXEwVXM
  • Download Link Is Ready Now! Whenever People Will Open The Link Like Above The File Will Start Downloading and Yes It is Direct Download Link.
  • For Clarification, We've Prepared The Image Inserted Below.
Changing Link

  • Go To Blogger >> Create New Post >> Link
  • Paste The Prepared Link in URL Box, Write "Download" in "Texts to Display" Box.

Edit Link Box Blogger

  • Click "OK"
  • Prepare The Post.
  • Click on "Publish" Button.
  • Thats All.
  • Final Words

Final Words

Thats how we can upload files for download in blogger. Unlike other file sharing services which are lazy, Google Drive is best, fast and reliable that's why we've chosen it. I think tutorial is become little long but we've tried to make it understandable. Feel free to ask for help in comments if you're facing any problem while trying this trick. Share this post with your fellow bloggers and also ask them to share with others. Good bye, Take care and have a nice day!


If you like our post or have any suggestion or got stuck at any steps implementing the widget to your blog then leave a comment below i will be glad to help you out. Subscribe to our blog, Like us on Facebook, +1 on Google+. Keep Blogging!

Monday, 20 January 2014

How to Backup Blogger Templates

Backing up the template , it is important in the affairs of blogging, but many are ignoring it. Backing up templates will greatly help us when we do edit or make changes to your blog and it also occurs when an error on our own blogs, so we have a copy of the template that is good or not to have damage to the script no error occurs even if later we've tried anticipate.
Backing template is absolutely necessary before we make any changes or bereksperiment on our blog, or we can create a new blog specifically for the trial if it does not want to do the backup template.

1. Please log in to Blogger
2. Click Arrow >> then click Template 


3. Find and click the button "Backpup / Restore" (upper right side)

4. In the new window that appears Click the "Download Full Template"


5. Download the template and save it on your computer and click "Close"


Maybe one day you need the results of the backup template so save your blogger template. Very easy way is not? so do not let this be missed if ever need to edit or make changes to scripts on your template.
If you like our post or have any suggestion or got stuck at any steps implementing the widget to your blog then leave a comment below i will be glad to help you out. Subscribe to our blog, Like us on Facebook, +1 on Google+. Keep Blogging!

Sunday, 19 January 2014

Turn Your Computer Into a WiFi Router For Free


Connectify is a software which can turn your PC into a Wi-Fi hotspot and share Internet with all your devices.

You can download this software from their official website : www.connectify.me

Steps To Use : 


  1. Download Connectify  
  2. Install the software
  3. The installation is simple and sweet and begins the wizard for the setup of a device
  4. You can set up a ssid name for the wifi hotspot
  5. Choose a wep password
  6. Click the start hotspot button
  7. Switch on the wifi adapter on your laptop
  8. Enable wifi on your device and then voila!! See the amazing wifi connection on your phone.

How To Get Your Adsense Account Approved

Hello everyone,
I see many guys have issues making their own Google Adsense accounts since they get rejected. In this Post, I will teach you on how you can get our own account approved by them. It works most of the times. 
First of all I will tell what Adsense is.AdSense provides a free, flexible way to earn money from your websites, mobile sites, and site search results with relevant and engaging ads. AdSense has helped over two million publishers grow their businesses in the last 10 years.


1st Step: 

Go to http://www.blogger.com/
Login or register with you Gmail id. Once registered, make a new blog in it. Once the blog has been created, now you would need to add a new template. You can easily download free themes, Just google it.


2nd Step: 

Make a new logo for your site and add it. Add 1 Facebook sharing widget on the side so users can share your posts. Add a good title to your site + description
Title Example: TechFoxy.
Description Example: TechFoxy will update you with latest technology and how-to articles on many topics like computers, Apple, Tablets, smart phones and everything else.
Once that is done, get a domain and park it to your blogger. After parking your domain, you would now need to post 12 videos from Youtube. Just go to Youtube and post videos which are related to your site. (Please make sure you post 1 video in 1 post, not all 12 videos in 1 post)


3rd Step:

Post some stuff related to your Blog. Your post should be atleast 30+ , Dont copy other blogs post, Write your own if you want to get approved.


Now apply for Google Adsense. When applying for Google Adsense, it asks you for your address, PLEASE ADD A POSTAL ADDRESS as they will be sending you a letter. Please provide an address where you receive letters. Once all is set, and application has been sent. Your account will be approved by ONE Google Adsense. When the 1st Google Adsense admin approves your account, you will see a red bar on top saying your account is still under review. So that means your account is still NOT approved fully yet! That means another Google Adsense admin will need to check it also. In that case, leave the site as it is and just share the links for a little traffic to your blog while it gets approved. Once it has been approved by the 2nd Google Adsense admin, your Google Ads will start to show on your blog. That means you are ready to start earning. The rest of information will be sent you such as PIN to your home address/postal address.


Thats all!


Hope you earn some good Bucks.

Add an Admin Control Panel in Blogger + Video Tut

demo admin

With this admin control panel for Blogger you can easily access the functions of the blog and you will not have to always open your blog page and the Blogger homepage at the same time.The Admin Control Panel will only be visible when the blog author is logged in. It is invisible to blog readers, similar to the Edit post/widget pencil icons which are only visible to you while you are logged in.


Lets Start.

Getting the Blog ID 


The first thing we need to do is get the ID of our blog by clicking on any option from our Blog Dashboard, for example Settings. Once we have clicked there, take a look at the address bar in your browser:

blogger id demo


Within the URL you will notice a string like this:
 blogID=XXXXXXXXX
Where XXXXXXXXX is the unique identifier (ID) for your blog.
Copy the ID for the blog you wish to work with so we can add this in the links for your admin control panel.

Adding the admin control panel to Blogger template


Step 1. Go to Template and click on the Edit HTML button:

template edit

Step 2. Click anywhere inside the code area and press the CTRL + F keys to open the Blogger' search box

Step 3. Paste this line inside the search box then hit Enter to find it:
 <body expr:class=
Note:  if you can't find this line, try to find the <body> tag.

Step 4. Just below this line, add the following code:
 <span class='item-control blog-admin'>
<style>
.control-panel ul{z-index: 20; position: absolute; margin: 0px auto; background-color: #F6F6F6; width: 100%; }
.control-panel ul li{display: inline-block; float: left; padding: 7px 0px;}
.control-panel ul li a {color:#686868;padding: 7px 15px;border-right: 1px solid #E3E3E3;font-weight: bold;font-size: 13px;}
.control-panel a:hover {text-decoration:none; color:#FC8F44;}
</style>
<div class='control-panel'>
<ul>
<li><a href='http://www.blogger.com/home'>My Blogs</a></li>
<li><a href='http://www.blogger.com/blogger.g?blogID=XXXXXXXXXXXXX#editor/src=sidebar'>New Post</a></li>
<li><a href='http://www.blogger.com/blogger.g?blogID=XXXXXXXXXXXXX#editor/target=page'>New Page</a></li>
<li><a href='http://www.blogger.com/blogger.g?blogID=XXXXXXXXXXXXX#posts'>All Posts</a></li>
<li><a href='http://www.blogger.com/blogger.g?blogID=XXXXXXXXXXXXX#comments'>Comments</a></li>
<li><a href='http://www.blogger.com/blogger.g?blogID=XXXXXXXXXXXXX#pageelements'>Layout</a></li>
<li><a href='http://www.blogger.com/blogger.g?blogID=XXXXXXXXXXXXX#templatehtml'>Edit HTML</a></li>
<li><a href='#' onclick='location.reload(true); return false;'>Refresh</a></li>
<li><a href='/' target='_blank'>New Tab</a></li>
<li><a href='http://www.blogger.com/blogger.g?blogID=XXXXXXXXXXXXX#basicsettings'>Settings</a></li>
<li><a href='http://www.blogger.com/blogger.g?blogID=XXXXXXXXXXXXX#overviewstats'>Stats</a></li>
<li><a href='http://www.blogger.com/logout.g'>Logout</a></li>
</ul>
</div>
</span>
Change XXXXXXXXXXXXX with your unique Blog ID previously copied, and be careful not to delete anything, like quote or any other character.

Step 5:. Click on the Save template button to save the changes.

If you like our post or have any suggestion or got stuck at any steps implementing the widget to your blog then leave a comment below i will be glad to help you out. Subscribe to our blog, Like us on Facebook, +1 on Google+. Keep Blogging!

Wednesday, 15 January 2014

Beautiful Flat UI Buttons in Blogger Video


Step 1. Installation


  1. Go To Blogger >> Template
  2. Click Edit HTML and Search For </head>
  3. Paste The Following Code Above </head>

<!-- Flat UI Buttons By www.ittechnohub.Com Start -->
<link href="http://fonts.googleapis.com/css?family=Open+Sans:300italic,400italic,600italic,700italic,800italic,400,300,600,700,800" rel="stylesheet" type="text/css"></link>
<style type="text/css">
.button {color:white!important; font-family:open sans; margin:10px 10px 10px 0;text-decoration:none!important; font-weight:700;border-radius:5px;-webkit-border-radius:5px;-moz-border-radius:5px;-ms-border-radius:5px;-oborder-radius:5px; transition:all .4s;-webkit-transition:all .4s;-moz-transition:all .4s;-ms-transition:all .4s;-o-transition:all .4s;}
.blue {background: #3498db;border-bottom: 3px solid #226693;}
.blue:hover {background:#2980b9;}
.green {background: #2ecc71;border-bottom: 3px solid #1F8C4C;}
.green:hover {background: #27ae60;}
.red {background: #e74c3c;border-bottom: 3px solid #922C20;}
.red:hover {background:#c0392b;}
.purple {background: #9b59b6; border-bottom: 3px solid #74398E;}
.purple:hover {background:#8e44ad;}
.seagreen {background: #1abc9c;border-bottom: 3px solid #127F69;}
.seagreen:hover {background: #16a085;}
.big {font-size:18px; padding:15px 20px;}
.medium {font-size:15px; padding: 10px 15px;}
.small {font-size:12px; padding:8px 10px;}
</style>
<!-- Flat UI Buttons By www.ittechnohub.Com End -->


  • Click "Save Template".
  • Installation Completed!


Step 2. Adding Flat UI Buttons in Blogger 


  1. Go To Blogger >> Create New Post
  2. Click "HTML" Tab
  3. Copy and Paste Any Button Code There.

Big Size Buttons
<a class="button blue big" href="#">Blue Button</a>
<a class="button green big" href="#">Green Button</a>
<a class="button red big" href="#">Red Button</a>
<a class="button purple big" href="#">Purple Button</a>
<a class="button seagreen big" href="#">SeaGreen </a>
Medium Size Buttons
<a class="button blue medium" href="#">Blue Button</a>
<a class="button green medium" href="#">Green Button</a>
<a class="button red medium" href="#">Red Button</a>
<a class="button purple medium" href="#">Purple Button</a>
<a class="button seagreen medium" href="#">Sea Button</a>
Small Size Buttons
<a class="button blue small" href="#">Blue Button</a>
<a class="button green small" href="#">Green Button</a>
<a class="button red small" href="#">Red Button</a>
<a class="button purple small" href="#">Purple Button</a>
<a class="button seagreen small" href="#">Sea Button</a>

  • Replace #  With The Link of Button.
  • Replace Red Color Text With The Text You Want to Show On That Button.
  • Prepare Post Content and Publish.
  • That's All. 

If you like our post or have any suggestion or got stuck at any steps implementing the widget to your blog then leave a comment below i will be glad to help you out. Subscribe to our blog, Like us on Facebook, +1 on Google+. Keep Blogging!

Tuesday, 14 January 2014

For Author Comments Different Background with Video Tutorial

In this tutorial we will learn how to highlight author comments so that they will have the background color, border, or anything that makes them stand out from the rest is different. To achieve this, we need to add code to the Blogger template and modifying styles according to our preferences.


How to highlight author comments in Blogger:


Step 1. Go to Template, click on Edit HTML


Step 2. Click anywhere inside the code area and try to find - using CTRL + F keys - this tag:
 </body>


Step 3. Just above it, paste the following code:
 <script src='http://code.jquery.com/jquery-latest.js'/>
<script>
$(function() {
function highlight(){
$('.user.blog-author').closest('.comment-block')
.css('border', '1px solid #FFA500')
.css('background','#F1F1F2 url("http://www.blogblog.com/1kt/transparent/white80.png")')
.css('color', '#444444')
.css('font-size', '12px')
.css('padding', '10px');
}
$(document).bind('ready scroll click', highlight);
});
</script>
Video Tu

If you like our post or have any suggestion or got stuck at any steps implementing the widget to your blog then leave a comment below i will be glad to help you out. Subscribe to our blog, Like us on Facebook, +1 on Google+. Keep Blogging!

Monday, 13 January 2014

How To Remove Blogger Attribution Gadget + Video

The Attribution gadget is the gadget in the footer that says "Powered By Blogger". If you have tried to remove this then you may of noticed this gadget is locked into you blog. To unlock it, follow the next steps:
blogger attribution, blogger hacks, powered by

Step 1. Log in to your Dashboard, go to Template > Edit HTML


Step 2. Search (CTRL+ F) for this code:

 <b:widget id='Attribution1' locked='true' title='' type='Attribution'>

Step 3. Replace true with false

Step 4. Click on the Save Template button

Now attribution gadget is unlocked and it can be removed. Just go to:
Layout and click on the edit link from Attribution gadget:


Click on the Remove button - as you can see in the screenshot below:


That was all !

How to Remove Image Border in Blogger + Video


How To Remove Image Border From Blogger


  • Go to Dashboard > Template > Customize > Advanced > Add CSS
  • paste the following code
  • Press enter after the last character of the last line }
  • Apply to Blog.

 .post-body img, .post-body .tr-caption-container, .Profile img, .Image img,
.BlogList .item-thumbnail img {
  padding: 0 !important;
  border: none !important;
  background: none !important;
  -moz-box-shadow: 0px 0px 0px transparent !important;
  -webkit-box-shadow: 0px 0px 0px transparent !important;
  box-shadow: 0px 0px 0px transparent !important;
}


If you Not getting just comment Below, Thanks


Sunday, 12 January 2014

Tips To Make Your Blog Popular!

blogging tips

Making a blog popular is not an easy tasks. It takes lots of efforts and time. A successfull blog is not achieved over night it requires patience and hardwork. In this post i will share will you few blogging tips to make your blog popular. This are some of tips that every blogger must know to boost his blog traffic. Especially if you have just started blogging or you are planning to start a brand new blog then don't miss this bloggers tips to have better future of your blog.

1. Blog Template  (Look)


Choosing Blog Template should be your first step in starting a blog. As it says "First Impression is the Last Impression". Before reading your blog content what visitors see is your blog look So if the template is dark and messy you can loose lots of traffic. So always use bright and simple blog template.
2. Social Media

Social Media plays Important role in boosting your blog traffic. Most of blog recieve blog traffic from Facebook, Twitter, Google+ So its very important to increase followers on social media sites.
Adding Facebook Like Box To Your Blog
Add Twitter Flying Bird

3. Attractive Post Image


While writing new blog article always add attractive images to your post. As it will attract more visitors to read your article. But always make sure to choose images that are relevant to content of your article.

4. Interact with Followers


Always stay connected with your blog visitors. Check your comments frequently and answer their queries. Appreciate them for their comments and reading your article.
5. Do not copy

Do not copy doesn't mean that you can not post what your fellow blogger had already  posted. It mean that  you can not copy and paste it on your blog. You can post it in your own style with your flavour and by giving credits to your fellow bloggers who first posted it.

6. Easy Navigation


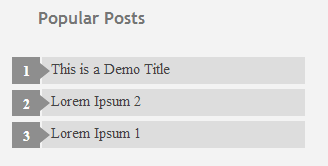
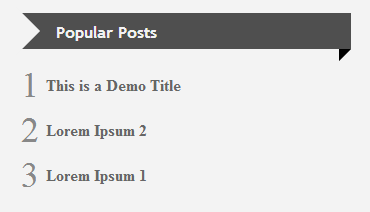
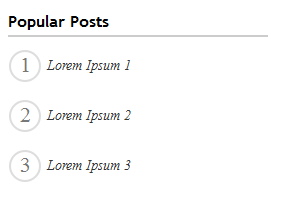
You blog should be simple and easy to navigate. You can achieve this by adding a Drop down Menu, Categories List on the sidebar and widgets for Popular and Recent posts.

7. Post Length


The length of your blog should be about 700 - 1400 words. Your blog post should not be lesser than 700 words as google penalize such blogs. If your blog is on technology your post can be small but you should post more then 2 times a day. In simple words it depends on nature of blog but always try to post your article with more then 700 words.

8. Contests


Always start interesting contests that benefits your blog visitors to keep your readers active and increase your blog followers.

9. Post Regulary


Good blogger always posts regularly and keep their readers up to date on new technology. Posting regularly will helps you to increase your alexa rank.

10. SEO Friendly Content


Lean some basic about SEO and try to write SEO friendly blog post title as well as post content. This can really help you to make your blog popular.

Disable Right Click On Your Blog To Prevent Copy/Paste Video

disable right click

Bloggers always wanted to prevent users or other bloggers from copying the content from their blog or website. Few Bloggers do lots of efforts by researching and writing great articles for their blog, whereas some just copy and paste article and tutorials on their blog from others. So to prevent such bloggers from copying the content from your blog i will teach you to disable right click on your blog with just simple Javascript. So lets get started.

How to disable right click on blog or website ?


  1. Go to Blogger Dashboard-->Design--> Edit Html.
  2.  Copy the code below and paste it in Edit HTML  before the </head>
<!--ittechnohub.com-->
<script language='JavaScript1.2'>
function disableselect(e){
return false
}
function reEnable(){
return true
}
document.onselectstart=new Function ("return false")
if (window.sidebar){
document.onmousedown=disableselect
document.onclick=reEnable
}
</script>
.
   5. Now save it and you are done disabling right click on your blog.

Customize Blockquote Style In Blogger [Update]


Instructions:


  1. Log in to Blogger, Go to Template Edit HTML
  2. Now find (CTRL+F) this code in the template: 
  3. Search for .post blockquote and delete it along with all its occurrences. In most templates the codes look like this 
.post-body blockquote { line-height:1.3em; }
OR
.post blockquote{ bla bla bla}


Style 1:


blockquote {
margin : 0 20px;
padding: 60px 30px 40px 20px;
background : #F1F8FE url(https://blogger.googleusercontent.com/img/b/R29vZ2xl/AVvXsEgpDF9CoT8DZaTOZzuRHEkCNY5n9tmNM_OXLQ7HKSLBmiBszFyMxnk8eF3ssHO2extvjMNbkb8XVp2VkOF-6jdf95x9-u6R-Kdl9NdbPl4Z9wSrGUJzHYzYO8hl6DZ-roRjBfhVF9fBq8c/s400/owl.png) no-repeat 350px 5px;
font: normal .9em "comic sans ms", Courier,"Times New Roman", Times, serif;
color : #000;
border-left: 8px dotted #DAB547;
}
blockquote p {
margin: 0;
padding-top:10px;
}


Style 1:


.post blockquote {
margin : 0 20px;
padding: 10px 20px 25px 20px;
background : #9FCFFF url(https://blogger.googleusercontent.com/img/b/R29vZ2xl/AVvXsEi0RWm_HSGY78qrxyQLyFnBTjNfQJL1i8dusCn0KVHBUEQZAYDO7wpXNnpqJ_xTn0GFrceCkRiybYddlx0mty72OStFbFCskNX4eryPK5_UXP-NL34_JM8ir08D_Ugy8_Pu_h0GQ5Uo8N0/s400/block22.gif) no-repeat right bottom;
font: bold .9em "comic sans ms", arial, Helvetica,verdana, Georgia;
color : #484848;
border: 5px dashed #fff;
}
.post blockquote p {
margin: 0;
padding-top:10px;
}

Style 1:

.post blockquote {
background: #F3F3F1 url(https://blogger.googleusercontent.com/img/b/R29vZ2xl/AVvXsEh5khBwE86vHjRAdKh0t-xyA7dRg4FHy3Q6s-0lMNGEX3gdGt7uweUZFZibrKjQGmkY7DDFClvGtjMPkwEduNVP-iKpEbqfAcEzQOdoGews3i7VIHQUPoosaRX-g3GX1vRluaFsJTW9QCo/s1600/comma-side-orange1.gif) ;
background-position:;
background-repeat:repeat-y;
margin: 0 20px;
padding: 20px 20px 10px 45px;
font-size: 0.9em;
font: italic 1.2em Georgia, "Times New Roman", Times, serif;
}
.post blockquote p {
margin: 0;
padding-top: 10px;
}

Style 1:


blockquote {
background: #484B52 url(https://blogger.googleusercontent.com/img/b/R29vZ2xl/AVvXsEhgiY3RxQTMWCJCz51qZE5PXq5h7JK0rU9qj3mQTaJPPlcX3xg_aMdlMqffi6nvSelWn4j8DW6vL86W8LrrXdQdc5b3wwUVkxCn2ZIMM0S7RHhkCSPctuEo-HgXYjhKPbKalnQce6UhRIc/s1600/green-black-side.gif) ;
background-position:;
background-repeat:repeat-y;
margin: 0 20px;
padding: 20px 20px 20px 50px;
color:#C7CACF;
font: normal 0.9em Helvetica, verdana, serif, Georgia, "Times New Roman";
}
.post blockquote p {
margin: 0;
padding-top: 10px;
}


Customizing Numbered Lists in Posts Blogger

A numbered list is achieved through the HTML code of a "ordered list". You don't have to worry about adding the HTML, because the editor does it for you by using this tool. If you go to the HTML tab, you'll see that the list you created appears something like this:
blogger gadgets, blogger widgets

How to Add Some Amazing Styles to Blogger ordered lists

Simply choose one of the styles below, then copy and paste the CSS code by going to Template > Customize > Advanced > Add CSS

Some Blogger templates might not allow adding CSS in that location. In that case, for adding the CSS style you need to access the Template's HTML - from your Blogger Dashboard, go to Template > Edit HTML and paste the code just above the ]]></b:skin> tag (press the CTRL + F keys to find it - you might need to click on the arrow to expand the code and after that search it again.
  1. How to Add Some Amazing Styles to Blogger ordered lists
  2. How to Add Some Amazing Styles to Blogger ordered lists
  3. How to Add Some Amazing Styles to Blogger ordered lists
  4. How to Add Some Amazing Styles to Blogger ordered lists
 .post ol{
counter-reset: li;
list-style: none;
*list-style: decimal;
padding: 0;
margin-bottom: 4em;
font: 13px 'trebuchet MS', 'lucida sans'; /* font size of each element */
text-shadow: 0 1px 0 rgba(255,255,255,.5);
}
.post ol li{
position: relative;
display: block;
padding: .4em .4em .4em .8em;
*padding: .4em;
margin: .5em 0 .5em 4.5em;
text-decoration: none;
}
.post ol li:before{
content: counter(li);
counter-increment: li;
position: absolute;  
left: -30px;
top: 50%;
margin-top: -1em;
background: #bada55; /* background color of the numbers */
height: 2em;
width: 2em;
line-height: 2em;
text-align: center;
font-weight: bold;
}
.post ol li:after{
position: absolute;
content: '';
left: -5px;
margin-top: -.7em;  
top: 50%;
width: 0;
height: 0;
border-top: 8px solid transparent;
border-bottom: 8px solid transparent;
border-left:8px solid #bada55; /* background color of the right arrow*/
}

Blogger Different Styles Popular Posts Widget Video

Blogger allows us to easily add a "Popular Posts" widget, that we select from its list of gadgets, and we can do that by going to the "Layout" of our Blog.

Preliminary steps: Add the gadget, if you haven't done it yet.

1. Select the "Layout" tab and add the "Popular Posts" gadget in that part of your blog you want to appear, such as in your sidebar, by clicking on "Add a Gadget".

2. Configure the widget to show only the post titles. You can do this by clicking on the "image thumbnail" and "snippet" checkboxes, as shown in the following image.
3. After configuring the widget, save the changes by clicking on Save, and then Save arrangement.

How to add the CSS to create the style of the Popular Posts widget

1. Choose a style, then copy the CSS that appears below the image that shows the style.

2. Select the "Template" tab, then click on Customize > Advanced > Add CSS and then paste the CSS style that you like the most.


3. Once you add the CSS, Save changes by clicking on the "Apply to Blog" button.

Note: Some Blogger templates might not allow adding CSS in that location. In that case, for adding the CSS style you need to access the Template's HTML - from your Blogger Dashboard, go to Template > Edit HTML and paste the code just above the ]]></b:skin> tag (press the CTRL + F keys to find it - you might need to click on the arrow to expand the code and after that search it again)

And that's it! You've already customized the popular posts widget when it shows only post titles.

Style 1:

blogger gadgets, blogger widgets, popular posts widget

 #PopularPosts1 h2{
padding:7px 0 3px 0;
width:100%;
margin-bottom:10px;
font-size:1.3em;
text-indent:-12px;
font-size:18px;
text-align:center;
color: #757575/* Color of the widget's title */
}
#PopularPosts1 ul{
list-style:none;
counter-reset:li;
padding:8px 0px 1px;
left:-7px;
width:290px;
}
#PopularPosts1 li{
position:relative;
margin:0 0 10px 0;
padding: 3px 2px 0 17px;
left:-5px;
width:285px;
}
#PopularPosts1 ul li{
background: #eee;
position: relative;
display: block;
padding: .4em .2em .4em 2em;
*padding: .2em;
margin: .5em 0;
background: #ddd;
text-decoration: none;
border-radius: .3em;
transition: all .3s ease-out;   
}
#PopularPosts1 ul li:before{
content: counter(li);
counter-increment: li;
position: absolute; 
top: 50%;
margin: -1.3em;
height: 2em;
width: 2em;
line-height: 2em;
font-size: 15px;
color: #fff/* text color of numbers */
background: #FB8835/* background color of numbers */
border: .2em solid #fff/* border color */
-webkit-box-shadow: 0 8px 5px -7px #888;
-moz-box-shadow: 0 8px 5px -7px #888;
box-shadow: 0 8px 5px -7px #888;
text-align: center;
font-weight: bold;
border-radius: 2em;
position: absolute;   
left: 0;
transition: all .3s ease-out;
}
#PopularPosts1 ul li:hover{
background: #eee;
}
#PopularPosts1 ul li:hover:before{
transform: rotate(360deg);   
}
#PopularPosts1 ul li a{
font: 14px Georgia, serif; /* font size of post titles */
text-shadow: 0 -1px 2px #fff;
color: #444;
display:block;
min-height:25px;
text-decoration:none;
text-transform: uppercase;
}
#PopularPosts1 ul li a:hover{
color: #444;
}

Style 2:

blogger gadgets, blogger widgets, popular posts widget


 #PopularPosts1 h2{
position:relative;
padding:8px 10px 6px 10px;
width:100%;
margin-bottom: 5px;
font-size:17px;
color:#757575/* Color of the widget's title */
text-align:left;
}
#PopularPosts1 ul{
list-style:none;
counter-reset:li;
padding:10px;
left:-8px;
width:100%;
}
#PopularPosts1 li{ /* Styles of each element */
width:100%;
position:relative;
left:0;
margin:0 0 1px 12px;
padding:4px 5px;
}
#PopularPosts1 ul li:before{
content: counter(li);
counter-increment: li;
position: absolute; 
left: -30px;
top: 50%;
margin-top: -13px;
background: #8E8E8E/* background color of the numbers */
height: 1.9em;
width: 2em;
line-height: 2em;
text-align: center;
font-weight: bold;
color: #fff;
font-size: 14px;
}
#PopularPosts1 ul li:after{
position: absolute;
content: '';
left: -2px;
margin-top: -.7em; 
top: 50%;
width: 0;
height: 0;
border-top: 8px solid transparent;
border-bottom: 8px solid transparent;
border-left:10px solid #8E8E8E/* background color of the right arrow*/
}
#PopularPosts1 ul li a{
color: #444;
text-decoration: none;   
font-size:15px;
}
#PopularPosts1 ul li {
position: relative;
display: block;
padding: .4em .4em .4em .8em;
*padding: .4em;
margin: .5em 0 .5em 0.4em;
background: #ddd;
transition: all .3s ease-out;
text-decoration:none;
transition: all .1s ease-in-out;
}
#PopularPosts1 ul li:hover{
background: #eee/* Background color on mouseover */
}   
#PopularPosts1 ul li a:hover{
color:#444/* Link color on mouseover */
margin-left:3px;
}

Style 3:

blogger gadgets, blogger widgets, popular posts
#PopularPosts1 h2{
position:relative;
right:-2px;
padding:8px 63px 6px 17px; 
width:100%;
margin:0;
font-size:16px;
background:#4F4F4F/* Background color */
color:#f2f2f2/* Color of the widget's title */
text-align:left;
text-indent:18px;
}
#PopularPosts1 h2:before{
position:absolute;
content:"";
top:36px;
right:0px;
width: 0px;
height: 0px;
border-bottom:12px outset transparent;
border-left:12px solid #000000; 
}
#PopularPosts1 h2:after{
position:absolute;
content:"";
top:-6px;
left:-5px;
width: 0px;
height: 0px;
border-bottom:24px outset transparent;
border-top:24px outset transparent;
border-left:24px solid #ffffff/* Arrow background color on the left */
}
#PopularPosts1 ul{
list-style:none;
counter-reset:li;
padding:10px;
left:-8px;
width:100%;
}
#PopularPosts1 li{ 
width:100%;
position:relative;
left:0;
margin:7px 0 16px 12px;
padding:10px  4px 0 5px;
}
#PopularPosts1 ul li:before{ 
content:counter(li);
counter-increment:li;
position:absolute;
top:-2px;
left:-20px;
font-size:35px;
width:20px;
color:#888888; 
}

#PopularPosts1 ul li a{
display:block;
font-size:16px/* Font size of the links */
color: #666/* Color of the links */
text-decoration:none;
transition: all .1s ease-in-out;font-weight: bold;
}
#PopularPosts1 ul li a:hover{
color:#3366FF;
margin-left:3px;
}

Style 4:

blogger gadgets, blogger widgets
 #PopularPosts1 h2{
padding:8px 10px 3px 0;
width:100%;
margin:0;
font-size:16px;
position:relative;
left:-20px;
display:block;
border-bottom:2px solid #ccc;
}
#PopularPosts1 ul{
list-style:none;
counter-reset:li;
padding:10px;
width:100%;
}
#PopularPosts1 li{ /* Styles of each element */
width:100%;
position:relative;
left:0;
margin:0 0 6px 10px;
padding:4px 5px;
}
#PopularPosts1 ul li:before{ /* Style of the numbers */
content:counter(li);
counter-increment:li;
position:absolute;
top:3px;
left:-39px;
font-size:21px;
width:28px;
height:28px;
border-radius: 50%;
color:#777; /* Text color */
border: 2px solid #ddd; /* Rounded border color */
padding:0;
text-indent:9px;
}
#PopularPosts1 ul li a{
display:block;
position:relative;
left:-45px;
width:100%;
margin:0;
min-height:28px;
padding: 5px 3px 3px 39px;
color:#333; /* color of the links */
text-decoration:none;
font-size:14px; /* Font size of the links */
font-style: italic;

}
#PopularPosts1 ul li a:hover{
color:#3366ff;
margin-left:3px;
}

Style 5:

Square Style

 /*--- WBT Popular Posts --- */
.popular-posts ul {
padding-left: 0px;
counter-reset: popcount;
}
.popular-posts a {
color: #777;
}
.popular-posts a:hover {
color: #111;
}
.popular-posts ul li:before {
list-style-type: none;
margin-right: 10px;
padding: 0.3em 0.6em;
counter-increment: popcount;
content: counter(popcount);
color: #FFF;
position: relative;
float: left;
font: italic bold 15px Tahoma;
margin-left:5px;
background: #ee504d;
margin-top:-2px;
border: 2px solid #EEE;
box-shadow: 0 3px 2px rgba(0, 0, 0, 0.3);
}
.popular-posts ul li {
border: 1px solid #eaeaea;
background:#fff;background:-moz-linear-gradient(top,#fff 0%,#f2f2f2 100%);
font: normal 12px verdana;
height: 30px;
-moz-transition: all 0.700s ease-out;
-o-transition: all 0.700s ease-out;
-webkit-transition: all 0.700s ease-out;
-ms-transition: all 0.700s ease-out;
transition: all 0.700s ease-out;
}
.popular-posts ul li:hover {
border: 1px dashed #bbbbbb;
-moz-transition: all 0.700s ease-out;
-o-transition: all 0.700s ease-out;
-webkit-transition: all 0.700s ease-out;
-ms-transition: all 0.700s ease-out;
transition: all 0.700s ease-out;
}
.popular-posts ul li a:hover {
text-decoration:none;
color: #000;
-moz-transition: all 0.700s ease-out;
-o-transition: all 0.700s ease-out;
-webkit-transition: all 0.700s ease-out;
-ms-transition: all 0.700s ease-out;
transition: all 0.700s ease-out;
}

Style 6:

Circular Style

/*--- WBT Popular Posts --- */
.popular-posts ul {
padding-left: 0px;
counter-reset: popcount;
}
.popular-posts a {
color: #777;
}
.popular-posts a:hover {
color: #111;
}
.popular-posts ul li:before {
list-style-type: none;
margin-right: 10px;
padding: 0.3em 0.6em;
counter-increment: popcount;
content: counter(popcount);
color: #FFF;
position: relative;
float: left;
font: italic bold 15px Tahoma;
margin-left:5px;
background: #56c55f;
border-radius: 25px 25px 25px 25px;
border: 2px solid #EEE;
box-shadow: 0 3px 2px rgba(0, 0, 0, 0.3);
margin-top:-2px;
}
.popular-posts ul li {
border: 1px solid #eaeaea;
background:#fff;background:-moz-linear-gradient(top,#fff 0%,#f2f2f2 100%);
font: normal 12px verdana;
height: 30px;
-moz-transition: all 0.700s ease-out;
-o-transition: all 0.700s ease-out;
-webkit-transition: all 0.700s ease-out;
-ms-transition: all 0.700s ease-out;
transition: all 0.700s ease-out;
}
.popular-posts ul li:hover {
border: 1px dashed #bbbbbb;
-moz-transition: all 0.700s ease-out;
-o-transition: all 0.700s ease-out;
-webkit-transition: all 0.700s ease-out;
-ms-transition: all 0.700s ease-out;
transition: all 0.700s ease-out;
}
.popular-posts ul li a:hover {
text-decoration:none;
color: #000;
-moz-transition: all 0.700s ease-out;
-o-transition: all 0.700s ease-out;
-webkit-transition: all 0.700s ease-out;
-ms-transition: all 0.700s ease-out;
transition: all 0.700s ease-out;
}